About Mine-Machine Add-on
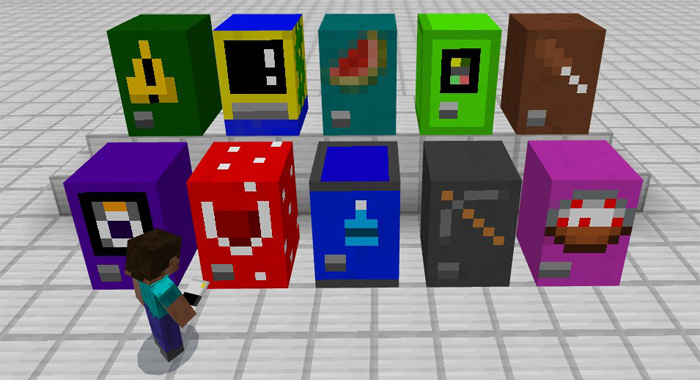
This add-on adds 14 different vending machines to Minecraft. You can use the machines to purchase food and drinks in exchange for some money. At the same time it’s very useful you can also use the different vending machines as decorations for your worlds in-game.
Creator: MicoLets_MC
How does it work? Mine-Machines are essentially vending machines. They replace shulkers and can be placed down on the ground anywhere you like. To buy some snacks or drinks you need a credit card you need to make sure that you’ve got some money on your bank account (also known as emeralds in your inventory). Shulker shells are replaced by credit cards.
iOS / Android: Long press on a vending machine and press Trade Windows 10: Right-click on a vending machine to buy some stuff
There are many different variants of machines and each sells different items. You can use (almost) any of the dyes to change the vending machine type.
Vending Machines
Use the dyes in your inventory to change the type of the vending machine.
Red – Yummy Blood Soda (Health Potions) Orange – Fire Soda (Fire Resistance Potions) Green – Toxic Soda (Poisonous Potions, Potatoes, Emeralds) Lime – Leaping Soda (Jump Boost Potions) Blue – Mineral Water (Water Bottles, Water Breathing and Night Vision Potions) Light Blue – Vegetables Store Machine (Vegetable Items) Cyan – Fruit Store Machine (Fruit Items) Purple – Dangerous Soda (Harming and Wither Potions) Magenta – Sweet Desserts Store Machines (Cookies, Milk, Cakes) Pink – Healing Soda (Regeneration Potions) Brown – Meaty Food Store Machine (Cooked Meat Items) Gray – Tool Store Machine (Tools and equipment) Light Gray – Weapon Store Machine (Weapons) Yellow – ATM (Withdraw/Deposit Emeralds/Credit Card) Black White
How to install Mine-Machine Add-on
- Download the .mcpack file using the button on this page.
- Open the downloaded file with Minecraft Bedrock Edition.
- Wait for Minecraft to confirm that the import has completed.
- Activate the imported pack in the world settings.
- Back up important worlds before installing community content.
Download Mine-Machine Add-on for free